Grab a cuppa and settle down. Sunday night and Rob Broom arrives for a couple of days of War and Conquest, one of my two favourite games.
The first action involves my Seleucids against Spartans, Rob is a big fan of Greek warfare and I knew this would be a tough fight, I have fought Greeks/Carthaginians before and they are tough opponents, too tough in my book up against phalangites but that is another story, I just had to get it in. My army had three pike units and two mercenary hoplites with an elephant for support as a core, the supporting troops were horse archers, archers and cataphracts, I was relying quite a bit on the armoured horse to help me win. First up the terrain did not favour me and I felt crushed into the centre, this became quite a problem for me as events unfolded, I also found my right flank looked decidedly weak and I could only spare one of the hoplite units to protect it with a load of skirmishers, Rob likes skirmishers as I would find out. The Spartans had a couple of elite units backed up with allied hoplites (not sure about all the enemy units), covered by a horde of skirmishers and some small cavalry units.
 |
| Massed pikes. |
 |
| Seleucids. |
 |
| Spartans |
 |
| The battlefield. |
I thought I could run the cataphracts up and threaten the Spartan right while my infantry ran forward to engage the Greek main line. At first I did well on my right and and there was a lot of confused fighting around a wood on that flank, Rob decided to send an elite Spartan unit to this flank while another sat behind the front line, I was happy that the perceived threat had been blunted. The left flank also seemed to be going to plan despite all my units being in a log jam around the villa and the annoying house on the hill, sadly for me my cataphracts were held up by some Greek cavalry which they should have rode down and were prevented from turning in to help my phalangites as the lines clashed.
 |
| That damn terrain. |
 |
| Come on boys. |
 |
| More blood spilled on my left. |
And now came the down side, I found it incredibly difficult to actually kill the Greeks despite doing a good number of hits due to their armour save (kevlar became the word of the day, Rob liked that). I lost a phalanx very quickly and the victors smashed into my hoplites, things were not looking good. The fighting on my right became ever more confused as I now had to pull the cataphracts away to pursue the routing Greek cavalry, the only good point was that Rob had two units which could not make it into the fight while I mopped up the right flank but to my chagrin a small unit of Greek cavalry had escaped, surely they would be no problem. I lost another phalanx and now had only one left, my hoplites in the centre were fighting like Trojans but just missing out on success. It was now that I managed in the ruin of my plans to bring the elephant into action and get revenge on one of the enemy hoplite units.
 |
| Crises for the Seleucids. |
 |
| Nellie puts a smile on my face. |
More confusion, my useless cataphracts failed a morale test as my last phalanx bit the dust and failed to hit some Spartans in the rear, but just as I was about to look for a white towel Nellie and my hoplites won through and routed their oppressors. Could I hold out, no I couldn't, those pesky light cavalry hit my hoplites on the right in the flank and the cowards ran (this was their first taste of battle), my cataphracts did come back but were beaten in the end, I think the elephant was my only survivor I could not continue.
A very hard and intense battle which lasted around six hours, several times I wailed and gnashed my teeth at Robs luck while ignoring my own, I did make a meal of the cataphracts not helped by the bravery of the Greek lights standing against them. And don't mention those damn hoplites running from villagers on mules!
We cleared away and set up the next game, my boys were up, Legio XII Fulminata against Rob's beautiful Masai army, he was playing it as Celts, lots of huge warbands with again a horde of skirmishing units. The Legion had a core of heavy legionary infantry in the centre with auxilieries on the flanks, arcehrs and light troops on the left and cavalry on the right, I had very few skirmishers. I basically had to hold the barbarians for the first clash when they had everything going for them and then grind them down, steady boys.
 |
| Thunderbolts ready! |
 |
| The battlefield. |
 |
| The Masai (Celts). |
My Lanciarii on the left swept forward and saw off a couple of the small skirmish units there and then began to threaten a large fanatic warband, which was drawn off to deal with the elusive skirmishers for the rest of the game taking them out of the battle. I had drawn off one cohort to move to my right while my cavalry sorted out the enemy there, things were looking good. The legion heavy infantry had now all advanced as far as I could as a large, difficult hill was making life difficult for Plan A. On the left my massed archers and the javelins of Aux. Co. I goaded a warband into attacking, the auxiliaries held and I then positioned two legionary cohorts and the archers to take advantage of the enemy when they broke through, to my amazement and Rob's disgust these guys held on turn after turn and I used the time wisely. I had now completed routing all the enemy on my right and began to move against the remaining enemy troops in the centre.
 |
| The armies advance. |
 |
| My cavalry swing wide. |
 |
| Rob's rally point. |
Rob was not the only general to be disappointed, my Contari swept through my horse archers in pursuit of a warband only for the archers to fail a morale check as they tried to get out of the way and they routed off the table. Despite this annoying set back the Thunderbolts were ready for the onslaught, in came the first large warband and was duly held by a cohort of recruits, Cohors I now came in on the enemy flank and put paid to their fight. The second huge warband hit Cohors II and III and again were held, Aux. Co. II now came in on their flank, my archers then smashed into the flank of the victorious warband who had been held back most of the battle by Aux. Co. I enabling the Twelfth to prepare for the assault.
 |
| Flank attack one. |
 |
| Flank attack two. |
 |
| The price of taking on the Thunderbolts. |
Needless to say I was overjoyed at the Thunderbolts performance, Rob had some bad luck and his attack had been slowed by one warband refusing to charge during one turn, again giving the Romans time to prepare. With their flanks gone the Masai were left with no option but to try a furious charge, which thankfully failed. Aux. Co. I although eventually ground down and routed were undoubtedly the men of the match.
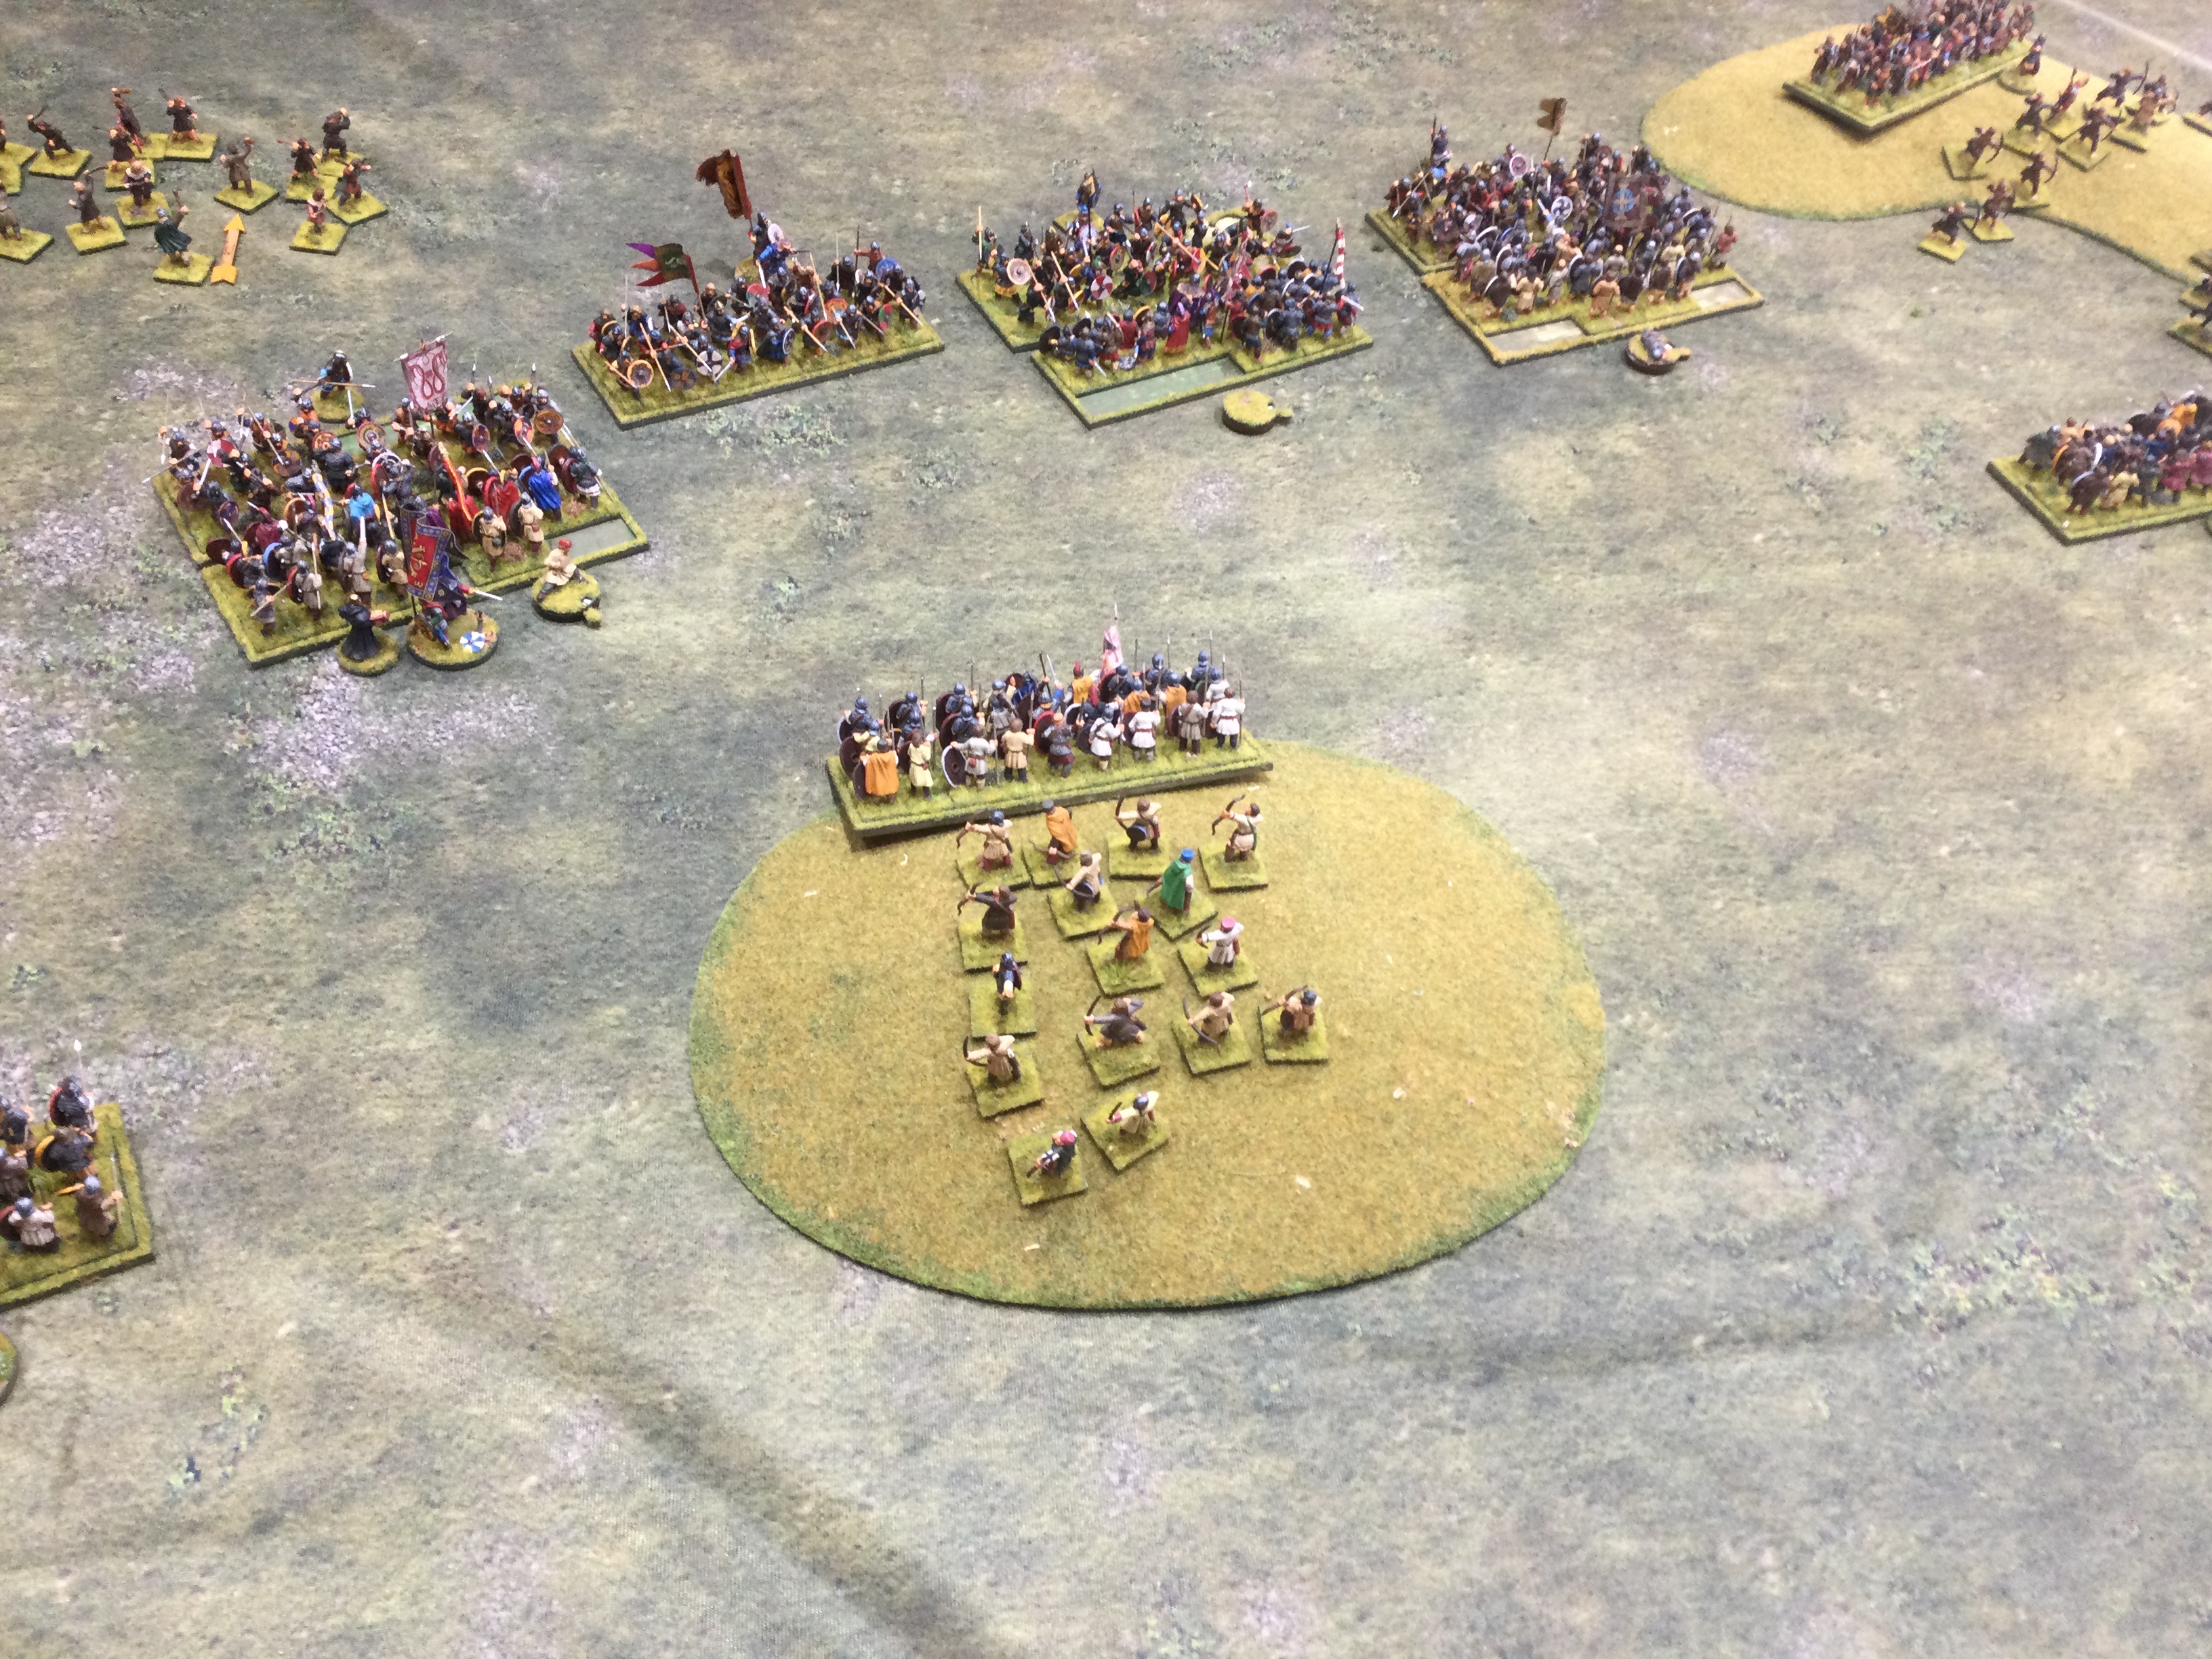
Tuesday morning and the final battle, Rob chose the Saxons and I took the Romano-British, we used my armies. Strangely enough Rob went cavalry heavy and put them all on his right flank he then put four infantry units in the line with some Gedriht in reserve with the King. I took two bodyguard units backed up by some Milites, I put a cavalry unit on both flanks, once I saw the deployment I decided to quickly advance my bodyguards to hit the Saxons opposite before their Hearthguard could enter the line, my left was to act cautiously.
 |
| Saxons. |
 |
| Romano-British. |
 |
| The battlefield. |
As the battle opened I saw an opportunity to throw caution to the wind and attacked the nearest enemy cavalry with mine while also sending skirmishers in support, this proved to be spectacularly successful, one cavalry unit was routed and the other two suffered casualties as their skirmish supports ran for the rear. Rob tried to get a cheeky flank charge with one of the units but I moved against them and forced them to run. Meanwhile my infantry had hit the enemy line and pushed their opponents back while his King manouvered to come into line. On the right I routed the enemy skirmishers and began to annoy the one Saxon unit there with my cavalry while threatening it with my Pedyts.
 |
| Fighting breaks out along the line. |
 |
| All is going well. |
 |
| Now we approach the Saxon left. |
The whole Saxon right began to run as I brought my victorious cavalry back into action, one infantry unit ran and one was dispersed. Although the Saxon cavalry managed to rally and attempted to get back in the fight numbers and circumstances were against them and they were again forced to rout. By now Rob only had his Ceorls and his Gedriht left on the field, the former were losing their fight and my cavalry had now formed up and were ready to deliver a flank attack to ensure victory. The Gedriht stood surrounded on a hill while the army fled, Rob handed over his sword.
Rob did not have much luck in this game and failed most of his morale checks which ensured his cavalry took no real part in the action, his infantry were outclassed by the British Comitatus and although putting up a fight eventually fled.
 |
| The Ceorls in trouble. |
 |
| The last of the Saxon cavalry also in trouble. |
Three terrific games and I learned a couple of things about the rules which I had not understood, I do have a couple of reservations, no rule system is perfect, but for me War and Conquest almost hits that target and that's what matters. Rob was a worthy opponent and a fine bloke to play against having made the journey all the way from Bristol on our faltering road system. Till the next time, I have a Triumph to prepare for, now where did I put that red paint ..........


Looks like a grand weekend of gaming George.
ReplyDeleteIt really was Stuart, I must keep the momentum up.
Delete2 1 for the home teams seems like a fair result..3 0 might have resulted in no further trips on the M4/5 for Rob!
ReplyDeleteThe final game might be a clue as to why Anglo Saxons etc generally only used their horses to get to the battlefield, then dismounted to fight?!
That thought had crossed my mind when I saw all the cavalry.
DeleteWhat a fabulous weekend of gaming George. All the games looked brilliant.
ReplyDeleteIt was indeed Ray, although I felt I had fought in a battle once it was over.
DeleteLol....I bet!
DeleteTwo days of gaming goodness there George, splendid looking games with wonderful toys. You certainly have a lot of stamina I am fatigued after 2/3 hours at the table.
ReplyDeleteJust reading this is now tiring Phil.
DeleteThree cracking looking games and what a super way to spend a weekend, great stuff!
ReplyDeleteThat’s wargaming for me Donnie :)
DeleteGosh, I need a sit down after just reading that! Hats off to your stamina at the table George! The Masai/Celts looked splendid!
ReplyDeleteWhen the wargaming drug wears off I suffer aches and pains David. The Masai are indeed splendid.
DeleteGeorge, so much gaming packed into your own Wargaming mini con. You mentioned Game #1 took six hours. How about the other two games? How long did you stand over the table all told? Great looking games and fine BatReps. Thanks again for the maps. My body and mind would be fatigued too after such an event.
ReplyDeleteWe had a brief stop for lunch and an hour for dinner. I think game 2 took about the same time, we did have larger than normal armies and did not call a halt after six turns, we also were not rushed. Game 3 took approx five hours. These were fights to the death. You can actually do a normal game of WAC in about three hours.
ReplyDeleteGeorge, from the photos it looked like there were as many Thunderbolts as Masai? Was Rob trying to recreate Cannae, you overlapped both flanks, rather obvious what would happen, barring the dice gods deserting you. The two other games looked more of a challenge?
ReplyDeleteIf the Romans can hold the first clash things should be fine, my units were smaller but more numerous, not sure numbers wise. The attacks were piecemeal which helped. The hardest game was the first.
DeleteA splendid trilogy of games George….
ReplyDeleteA nice interesting mix of armies as well…
All the best. Aly
A great few days Aly, wargaming at its best.
DeleteHi George - Always a pleasure reading your latest Romano-British clash. My current interest is the Italian Wars in which Helion & Company have produced some fine books. Only waiting for their All is not lost, save honour - Wargames Guide to the Italian Wars to be published. I believe you do some work for them. My only "dream-team" with Helion & Company is that they should team up with the Spanish photo-artist Jordi Bru with their books. Jordi renders these historical reenactments like the Italian Wars to a new level - Check out Jordis rendition of the 500th anniversary of The Battle of Pavia from the link below. Just think Helion books with Jordi photo-artist illustrations, a truely mouth-watering combination. https://www.facebook.com/photo?fbid=1065911828914917&set=a.420014836837956
ReplyDeleteItalian Wars is about to become flavour of the month. Helion’s book is out this month, I drew all the maps. Also Warlord’s supplement will be out in June. I have seen those pictures before.
DeleteYes who knows how popular wargaming the Italian Wars will become. In the past ( ok last century ) you either did ancients, napoleonics, american civil war or second world war. Looks like Italian Wars is developing a niche but expanding following of it's own.
ReplyDelete